Welcome back! At this point, we've covered a full overview of shaders in GameMaker so now you are ready to write some shader effects! This tutorial covers the basics of color effects such as color inversion, grayscale, saturation and sepia tone. There is also GM Shaders example project which includes all the code covered here. I'll leave another link for you at the bottom of the page.
This was written in collaboration by my friend, Bart; I wrote the code/examples and he wrote the tutorial. You can expect to see more collaboration tutorials in the near future!
Okay, now time to dig in!
Colors in GameMaker
GameMaker has extensive documentation on colors under Color and Alpha in the manual. The most common functions to create a color are:make_color_rgb(red, green, blue)- Create a color from the given red, green and blue componentsmake_color_hsv(hue, saturation, value)- Create a color from the given hue, saturation and value componentsmerge_color(color1, color2, amount)- Mix colorscolor1andcolor2according toamount. An amount of 0.5 is right in the middle.
c_black and c_white, or define a color by assigning a hexadecimal value. For that you start with a $ and then type the hexadecimal value of the blue, green and red component respectively. You can also add the alpha value in front of those. Each of these can go from 00 to FF, or, in decimal, from 0 to 255. The order of the components is ABGR.
// A couple of common colors in hexadecimal
color = $000000;  // c_black
color = $FFFFFF;  // c_white
color = $0000FF;  // c_red
color = $FF0000;  // c_blue
color = $00FFFF;  // c_yellow
To get the red, green and blue components of a color you can use color_get_red, color_get_green and color_get_blue.
Attributes
Colors can be passed to a shader through vertex attributes. The vertex color is stored in the vertex attribute in_Colour by default.
If you don't draw your own vertex buffer using vertex_submit or when you draw custom primitives - so you simply use GameMaker's built-in draw_sprite and related draw functions - then this attribute contains the value of the instance's image_blend variable.
If you draw a custom primitive then in_Colour contains the value that you defined in a call to draw_vertex_color or draw_vertex_texture_color or, when you use the functions that don't specify a color, the value set by draw_set_color.
If you submit your own vertex buffer to the GPU then in_Colour contains the color that you assigned to that vertex using vertex_color.
An important thing to keep in mind when using colors in custom vertex buffers is that a color is stored as four bytes in a buffer, with component values ranging from 0 to 255, but it is turned into a vec4 in the shader, which are four floats in the range 0 to 1.
Uniforms
As mentioned above, all of the above colors contain the red, green and blue components in a range of 0 to 255. Most of the time when you're using these colors with shaders you don't have to worry about the values being usable in the shader. If you add them as a vertex attribute, you simply pass the color as the argument to the function.
If you draw a primitive you also pass the color as the argument to the function.
In each of those cases the components' values range from 0 to 255. Once you're inside the shader they will be floats that range from 0 to 1 (colors are either a vec3 or a vec4 if the alpha component is included).
Any 3 or 4 floats that are sent to a shader via a uniform can also be interpreted as a color (+ alpha). But in this case you have to divide the components by 255 yourself, so in the end you'll send the following values for a color:
// Conversion of a color variable in GameMaker to an array of values
// that is ready to be sent as a uniform
var color = c_white;
var color_uniform_values = [
    color_get_red(color)/255,
    color_get_green(color)/255,
    color_get_blue(color)/255,
    // alpha    // Alpha is already a value from 0 to 1
];

// Setting the uniform's value
shader_set_uniform_f_array(u_colors, color_uniform_values);
It is probably clear that you could do this conversion in the vertex shader or the fragment shader. But that would not be very efficient since the calculation will then be done for every vertex or fragment. It is also simply very convenient to have the values ready for use in the shader!
Okay, so far for the rather dull yet necessary part of how to guarantee to get your colors in a shader correctly.
It is now time to look at the inside of the shader!
The passthrough shader
gl_FragColor = v_color * texture2D( gm_BaseTexture, v_texcoord);texture2D looks up the actual pixel color on the texture that you're drawing.Every component of
v_color is multiplied by the respective component of texture2D. The result of it is assigned to gl_FragColor.Now that you know this you can see why
image_blend is set to white by default to get the original pixel's color. The r, g, and b components of v_color all have to be 1 so the final color becomes the color of the pixel on the texture. Interestingly enough this also means that setting the blend color to something other than white will always make the resulting image darker.
Inverting colors
One of the more basic things that you can do with colors is invert them. A color is inverted by inverting every component except the alpha component.
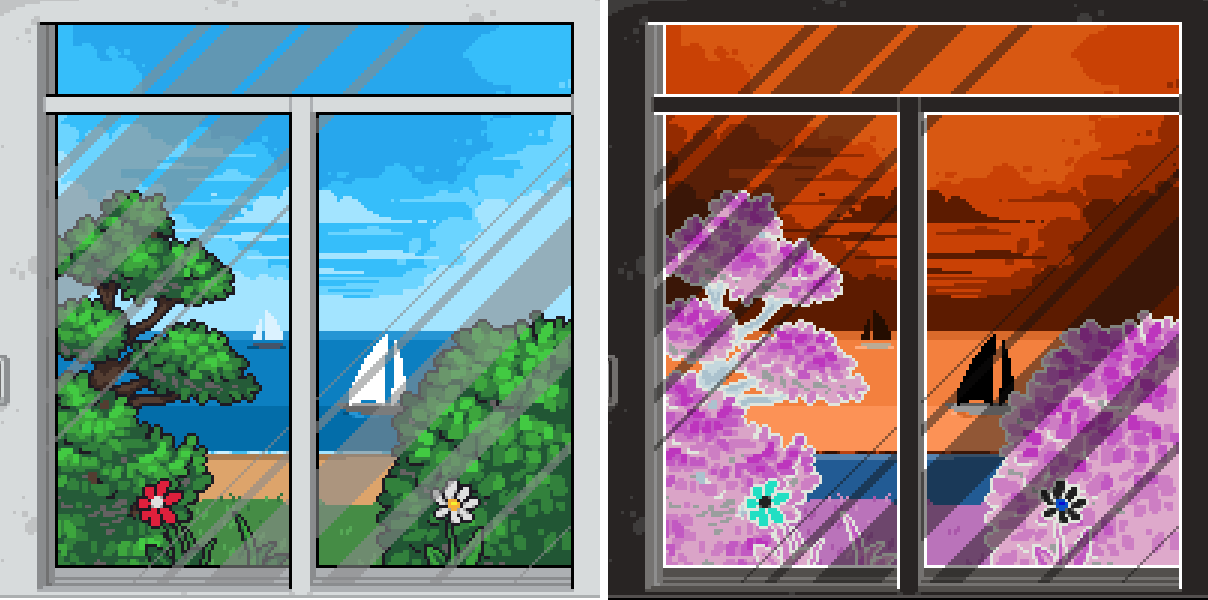 On the left the view with no shader applied. On the right the view with inverted colors.
Inverting a component doesn't mean that you "negate" it. As mentioned before component values range from 0 to 1. So you cannot go below 0. What you do here is subtract the component value from 1, so you do one minus component:
//The formula for a single component
float new_component_value = 1.0 - component_value;
// How you could write this in GML (remember GM ranges from 0 to 255)
r_invert = 255 - color_get_red(color);
g_invert = 255 - color_get_green(color);
b_invert = 255 - color_get_blue(color);
invert = make_color_rgb(r_invert, g_invert, b_invert);
// The much shorter way of writing this in a shader
vec4 invert = vec4(1.0 - color.rgb, 1.0);
Food For Thought (1) Which color do you have to invert to end up with a yellow color? Which color do you have to invert to end up with a purple color? Which color doesn't change at all by inverting it? Why is that?
Grayscale
A second basic effect is grayscale. As you may remember from #4 Tips and Tricks, here you take a weighted sum of the red, green and blue components and use that result as the value for every component. The weights are adjusted to account for the perception of color that we humans have.
 A different part of the avid GameMaker:Studio developer's room shown in grayscale.
The formula to get the grayscale value is the following:
float gray = 0.2126 * tex.r + 0.7152 * tex.g + 0.0722 * tex.b;dot function:
float gray = dot(tex, vec4(0.2126, 0.7152, 0.0722, 0.0));tex.rgb and a vec3.
To get the final pixel color you create a new vector with all components set to the value of gray:
gl_FragColor = vec4(gray, gray, gray, 1.0);dot function to take the (non weighted) average of the rgb components?
Saturation
The grayscale value can be used further to create a saturation effect. In this effect the original color is mixed or blended with the new grayscale color depending on the saturation value. As the description may have given away, you can do this in a shader using the mix function.
The fragment shader code for a saturation shader looks like this:
vec4 tex = v_color * texture2D( gm_BaseTexture, v_texcoord);
float gray = dot(tex, vec4(0.2126, 0.7152, 0.0722, 0));

vec4 shade = vec4(gray, gray, gray, tex.a);
gl_FragColor = mix(shade, tex, u_saturation);
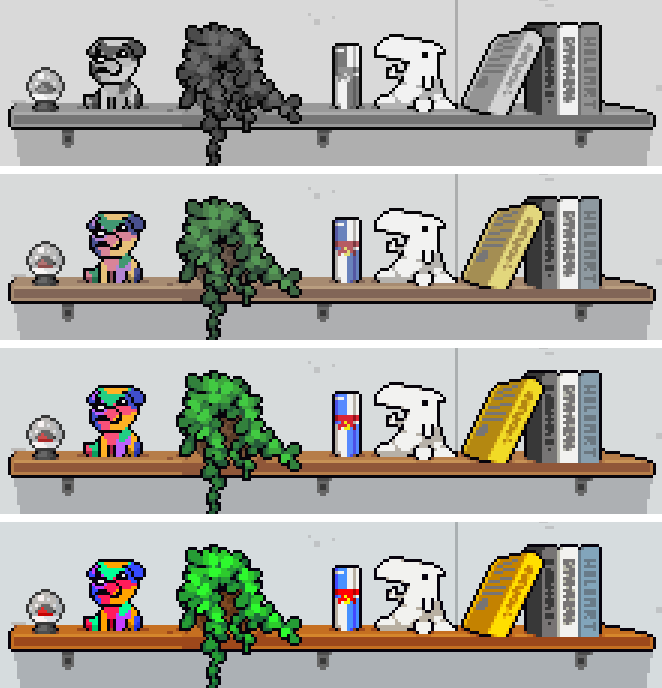 The same image shown with increasing values for saturation: 0 (grayscale), 0.5 (desaturated), 1 (original color) and 1.5 (oversaturated)
The reason why this works the way it does becomes more clear if you look at the mathematical formula that mix uses. Let's take a detailed look at this for a moment:
new_rgb = shade * (1 - u_saturation) + tex * u_saturation;u_saturation to 0 here and all that's left is shade. Set it to 1 and what's left is tex.For values of
u_saturation between 0 and 1 the factor (1 - u_saturation) is always greater than 0, so you get an influence of the grayscale value shade.Things get really interesting once you set
u_saturation to a value greater than 1.
The factor (1 - u_saturation) then becomes negative so you then subtract gray instead. At the same time you increase the influence of the other term: the original color tex becomes more important when u_saturation is greater than 1.
Tone Shader
In a tone shader you do things differently, but only slightly. So far the final fragment color has been a linear mix of the grayscale value and the original pixel color. By applying a new color to the grayscale value, the tone, you end up with a tone shader. You then no longer blend the pixel color between a simple grayscale color and the original one, a tone shader gives you the possibility to blend between the original pixel color and a colorized grayscale image!
The tone is sent to the shader via a new color uniform u_tone.
vec4 tex = v_color * texture2D( gm_BaseTexture, v_texcoord);
float gray = dot(tex, vec4(0.2126, 0.7152, 0.0722, 0));

vec4 shade = vec4(gray * u_tone.rgb, tex.a);
gl_FragColor = mix(shade, tex, u_tone.a);
Sepia
This tone might be familiar to you, it gives the typical look of an old photograph. Sepia is a color that is somewhere between red and brown. Wikipedia defines the color sepia as follows:
Sepia is a reddish-brown color, named after the rich brown pigment derived from the ink sac of the common cuttlefish Sepia.If you set the tone color to this color then you get a nice sepia effect! Let's do that for a moment and see what the result is:
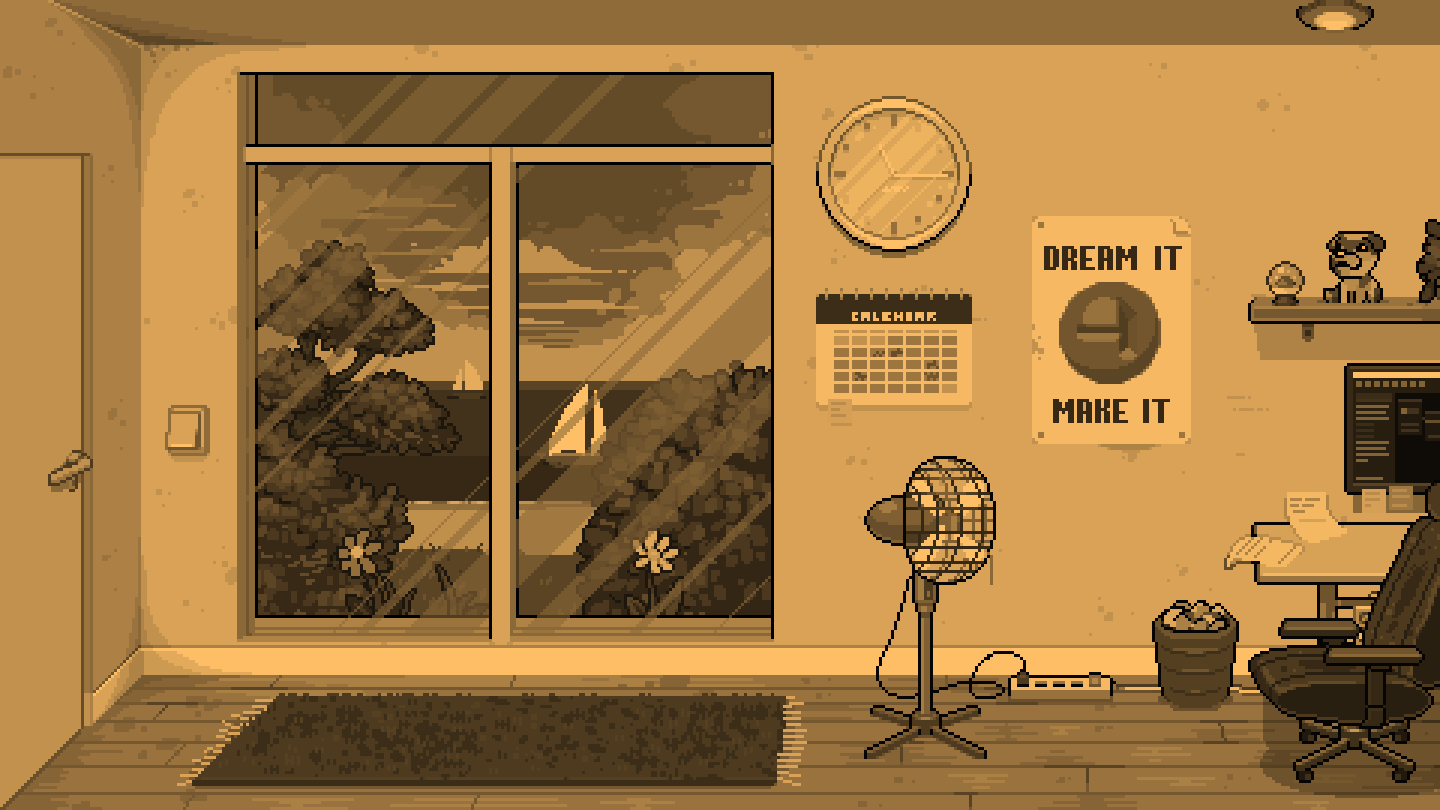 The same environment as before, now shaded in a sepia tone.
This is one example of a color that you can use to colorize your image but of course any color is possible.
You may notice that the original pixel color is completely gone here. That is because the alpha component of u_tone is set to 1. You can change that alpha value to start blending between the toned image and the original one to get more possible effects based on this shader.
Summary
Congratulations! In this tutorial you learned how to write a color inverter, grayscale shader, saturation shader and sepia tone shader!
You learned in which ways GameMaker supports colors, how you can define them and through which ways you can send the values of those colors to a shader.
The tutorial then covered the first basic effects that you can achieve with colors: inverted colors, grayscale and saturation and tone, with sepia as a specific example.
Hopefully this tutorial has given you the basic knowledge and insights to get your first color shaders working and start playing around with pixels' colors!
Next time, we're going to go deeper into color effects!
Answers
-
Blue is the color that you have to invert to get yellow, since
vec3(1.0, 1.0, 1.0) - vec3(0.0, 0.0, 1.0) = (1.0, 1.0, 0.0).
A color of 50% gray doesn't change at all sincevec3(1.0, 1.0, 1.0) - vec3(0.5, 0.5, 0.5) = (0.5, 0.5, 0.5). -
The most important here is that you take a color's rgb or set the alpha to 0. Then take the dot product with a vector with all components set to 1/3:
dot(color.rgb, vec3(1.0/3.0)). This could be generalized by 1/number_of_components_to_be_averaged.